Introduction to Terraform
We have updated this text for you!
Update date: 22.12.2024
Author of the update: Szymon Gamrat
IaC is a key attribute of enabling best practices in DevOps. Developers can be more involved in defining configuration because they can do it the way they are most proficient in – by writing code. Ops teams get involved in the earliest phases of the development process. Tools like Terraform bring visibility to state and configuration, simplify automation by making processes more efficient and less error-prone. In this article, we will learn what Terraform is, how to configure it, how to provide cloud resources with one of the cloud providers.
What is Terraform
Terraform is tool developed by HashiCorp that allows you to define and manage your infrastructure as code (IaC). This means you can write code to set up and manage your cloud resources, such as servers, databases, and networking components, across various cloud providers like AWS, Azure, and Google Cloud Platform.
Key Concepts
- Configuration Files: These are written in HashiCorp Configuration Language (HCL) and define the infrastructure you want to create.
- Providers: Plugins that allow Terraform to interact with different cloud providers and services.
- Resources: The components of your infrastructure, such as virtual machines, storage, and networks.
- State: Terraform keeps track of your
Advantages of Using Terraform
- Automation: Terraform automates the process of setting up and managing infrastructure, reducing the risk of human error and saving time
- Consistency: By defining your infrastructure as code, you ensure that your setup is consistent across different environments (development, testing, production)
- Multi-Cloud Support: Terraform supports multiple cloud providers, giving you the flexibility to manage resources across different platforms
- Version Control: You can version your infrastructure code just like application code, making it easier to track changes and collaborate with team members
- Declarative Language: Terraform uses a simple, declarative language (HCL) that is easy to learn and understand
Extensibility: Terraform is highly extensible with a wide range of plugins and modules available to extend its functionality
Before we begin
You should know the commands that help you build, check, and apply infrastructure code.
Basic Terraform Commands
terraform init
Initializes a Terraform configuration. This command sets up the necessary plugins and prepares your working directory for other Terraform commands.
Usage: Run this command in the directory containing your `.tf` files.
terraform plan
Creates an execution plan, showing what actions Terraform will take to achieve the desired state defined in your configuration files. It’s a dry run, so no changes are made.
Usage: Use this command to review changes before applying them.
terraform apply
Applies the changes required to reach the desired state of the configuration. This command will create, update, or delete resources as necessary.
Usage: After reviewing the plan, use this command to make the changes.
terraform destroy
Destroys the infrastructure managed by Terraform. This command will remove all resources defined in your configuration files.
Usage: Use this command when you want to clean up and remove all resources.
terraform show
Displays the current state or a saved plan. This command helps you understand the current state of your infrastructure.
Usage: Use this command to inspect the state file.
terraform validate
Validates the configuration files in a directory. This command checks for syntax errors and ensures that the configuration is syntactically valid.
Usage: Use this command to validate your configuration before applying it.
terraform fmt
Formats the configuration files to a canonical format and style. This command helps keep your code clean and readable.
Usage: Use this command to format your `.tf` files.
Example Workflow
Initialize: terraform init
Format: terraform fmt
Plan: terraform plan
Validate: terraform validate
Apply: terraform apply
Destroy: terraform destroy
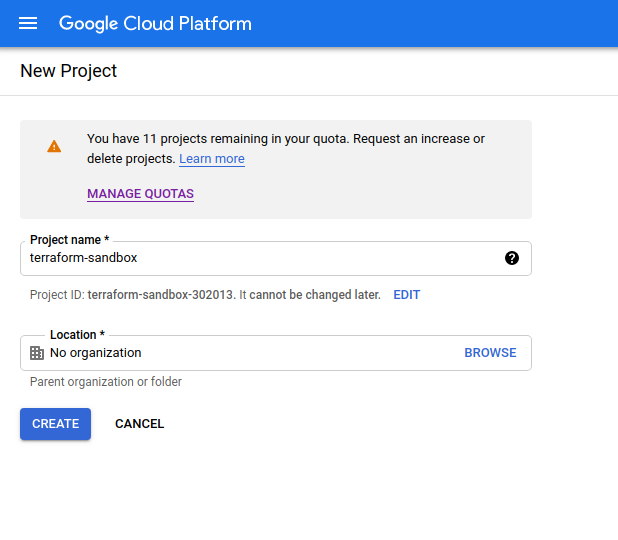
Before we start playing with Terraform we need to set up the Google Cloud project. If you already have one you can use it but it is recommended to create a new one to keep it separated and easy to tear down later. You will be starting with basic resources, which can incur real, although usually minimal, costs. Pay attention to the pricing on the account. If you don’t already have a Google Cloud account, you can sign up for a free trial and get $300 of free credit.
Create a new project:

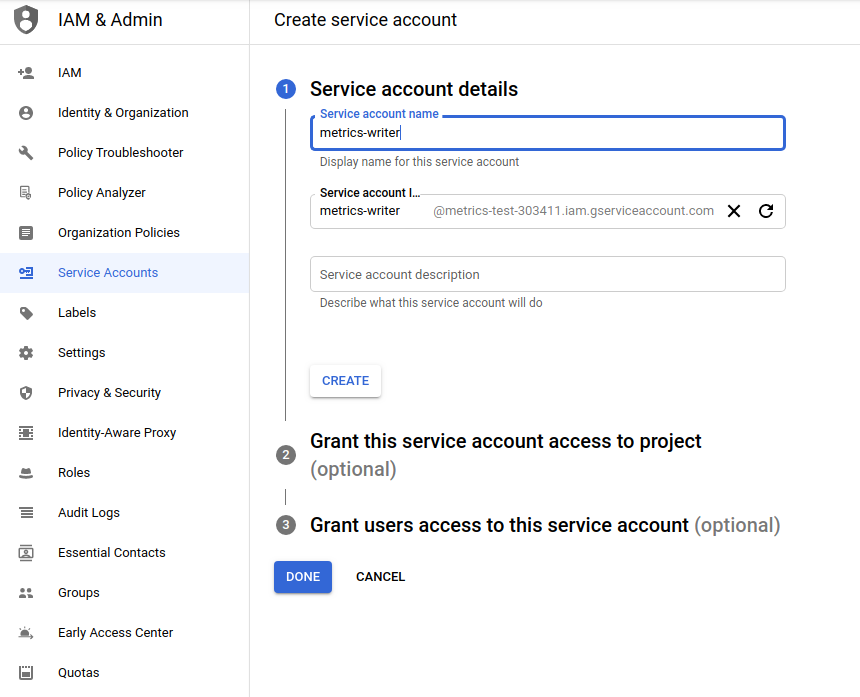
Create a Service Account…

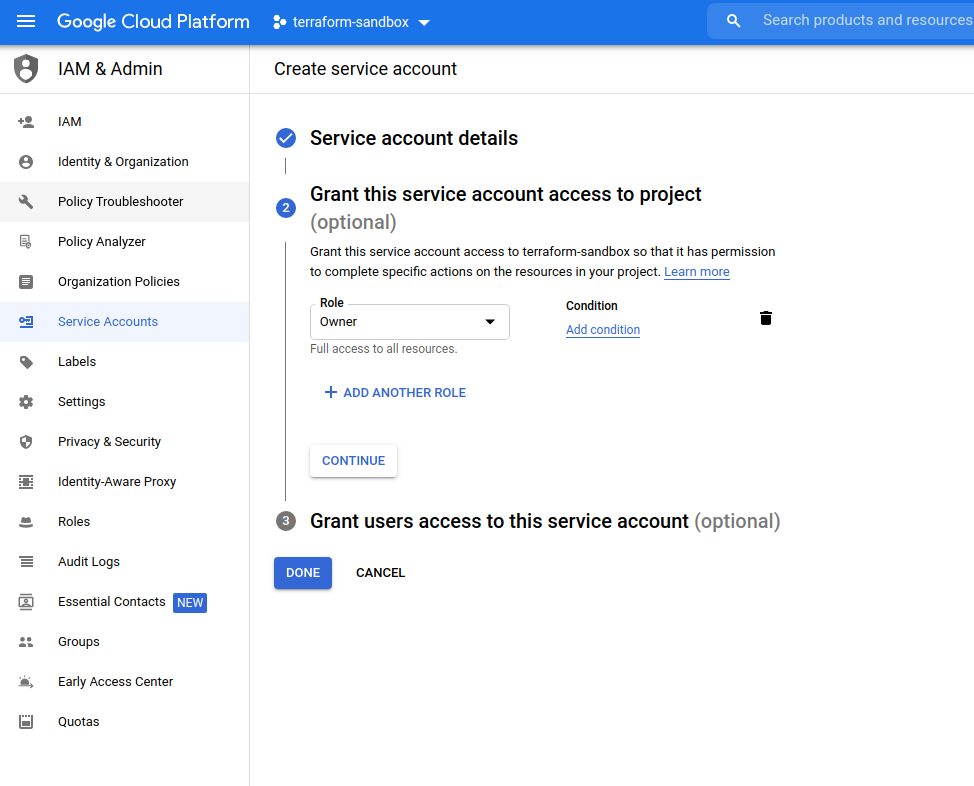
…and grant the “Owner” role:

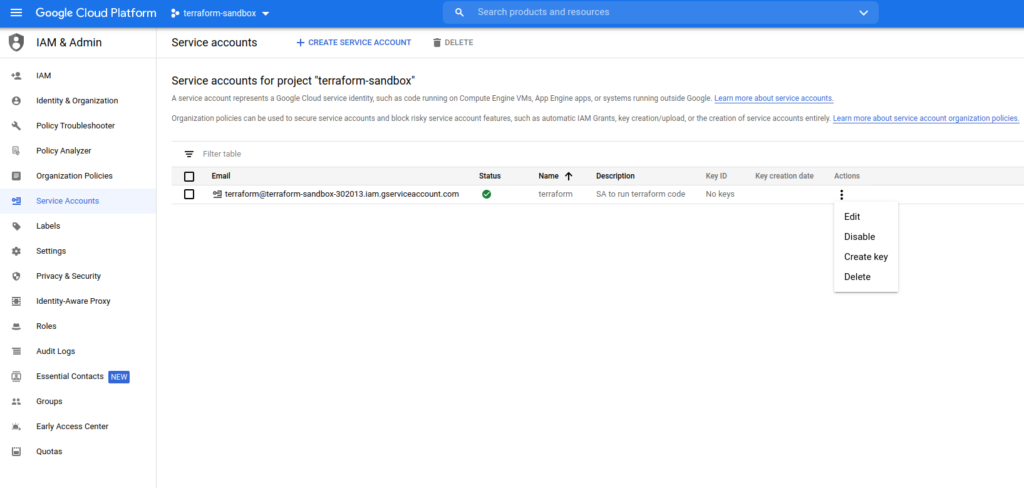
Download Service Account credentials in json format. Store them securely.

Install Terraform
To install Terraform, find the appropriate package for your system and download it as a zip archive. After downloading Terraform, unzip the package. Terraform runs as a single binary named terraform. Any other files in the package can be safely removed and Terraform will still function. Finally, make sure that the terraform binary is available on your PATH. This process will differ depending on your operating system. Verify the installation with the following command:
terraform -help
If a help message has been displayed it means that installation was successful and we can go to:
Our first terraform project
If you would like to create different resources than described in this article or you are using an existing project – please verify if a related API is enabled in your project. For new projects Cloud Storage API should be enabled so no action is required. Create a folder in a convenient location and the main.tf file inside. The file name isn’t actually important – as long as it uses a .tf extension. Terraform itself cannot “talk” to different cloud vendors’ API’s instead, it is using sub-programs called providers that translate configuration into API calls. In our case, it will be a “google” provider so the following configuration must be added to main.tf file:
// Configure the Google Cloud provider
provider "google" {
 project     = "terraform-sandbox-302013"
 region      = "europe-west3"
}
Now we can try to define some resources that we want to create. To keep it simple let’s start with a single Cloud Storage bucket, add the following configuration to the main.tf file:
resource "google_storage_bucket" "default" {
  name          = "terraform-sandbox-302013-my-storage"
}
Now we are almost ready to let terraform do its job. The last thing we need to take care of is authenticating API calls that will be performed by the “google” provider. There are several ways of doing it but the simplest one will be to use the GOOGLE_APPLICATION_CREDENTIALS environment variable, setting the value to the location of the json key file (the one downloaded during the project setup).
Now we can initialize the terraform project:
$ terraform init

Initializing the backend...

Initializing provider plugins...
- Finding latest version of hashicorp/google...
- Installing hashicorp/google v3.52.0...
- Installed hashicorp/google v3.52.0 (signed by HashiCorp)

Terraform has created a lock file .terraform.lock.hcl to record the provider
selections it made above. Include this file in your version control repository
so that Terraform can guarantee to make the same selections by default when
you run "terraform init" in the future.

Terraform has been successfully initialized!

You may now begin working with Terraform. Try running "terraform plan" to see
any changes that are required for your infrastructure. All Terraform commands
should now work.

If you ever set or change modules or backend configuration for Terraform,
rerun this command to reinitialize your working directory. If you forget, other
commands will detect it and remind you to do so if necessary.
Now we can check what will be created if we decide to apply this code to the project:
$ terraform plan

An execution plan has been generated and is shown below.
Resource actions are indicated with the following symbols:
  + create

Terraform will perform the following actions:

  # google_storage_bucket.default will be created
  + resource "google_storage_bucket" "default" {
      + bucket_policy_only          = (known after apply)
      + force_destroy               = false
      + id                          = (known after apply)
      + location                    = "US"
      + name                        = "terraform-sandbox-302013-my-storage"
      + project                     = (known after apply)
      + self_link                   = (known after apply)
      + storage_class               = "STANDARD"
      + uniform_bucket_level_access = (known after apply)
      + url                         = (known after apply)
    }

Plan: 1 to add, 0 to change, 0 to destroy.

------------------------------------------------------------------------

Note: You didn't specify an "-out" parameter to save this plan, so Terraform
can't guarantee that exactly these actions will be performed if
"terraform apply" is subsequently run.
As we can see from the command output there will be one resource created if we decide to apply this configuration. It matched both our intention and expectation so we can now apply it to our project:
$ terraform apply

An execution plan has been generated and is shown below.
Resource actions are indicated with the following symbols:
  + create

Terraform will perform the following actions:

  # google_storage_bucket.default will be created
  + resource "google_storage_bucket" "default" {
      + bucket_policy_only          = (known after apply)
      + force_destroy               = false
      + id                          = (known after apply)
      + location                    = "US"
      + name                        = "terraform-sandbox-302013-my-storage"
      + project                     = (known after apply)
      + self_link                   = (known after apply)
      + storage_class               = "STANDARD"
      + uniform_bucket_level_access = (known after apply)
      + url                         = (known after apply)
    }

Plan: 1 to add, 0 to change, 0 to destroy.

Do you want to perform these actions?
  Terraform will perform the actions described above.
  Only 'yes' will be accepted to approve.

  Enter a value: yes

google_storage_bucket.default: Creating...
google_storage_bucket.default: Creation complete after 2s [id=terraform-sandbox-302013-my-storage]

Apply complete! Resources: 1 added, 0 changed, 0 destroyed.
Using web console we can now verify that the bucket really appeared in our GCP project:

When we do not need the bucket any more we can let Terraform to remove it:
$ terraform destroy

An execution plan has been generated and is shown below.
Resource actions are indicated with the following symbols:
  - destroy

Terraform will perform the following actions:

  # google_storage_bucket.default will be destroyed
  - resource "google_storage_bucket" "default" {
      - bucket_policy_only          = false -> null
      - default_event_based_hold    = false -> null
      - force_destroy               = false -> null
      - id                          = "terraform-sandbox-302013-my-storage" -> null
      - location                    = "US" -> null
      - name                        = "terraform-sandbox-302013-my-storage" -> null
      - project                     = "terraform-sandbox-302013" -> null
      - requester_pays              = false -> null
      - self_link                   = "https://www.googleapis.com/storage/v1/b/terraform-sandbox-302013-my-storage" -> null
      - storage_class               = "STANDARD" -> null
      - uniform_bucket_level_access = false -> null
      - url                         = "gs://terraform-sandbox-302013-my-storage" -> null
    }

Plan: 0 to add, 0 to change, 1 to destroy.

Do you really want to destroy all resources?
  Terraform will destroy all your managed infrastructure, as shown above.
  There is no undo. Only 'yes' will be accepted to confirm.

  Enter a value: yes

google_storage_bucket.default: Destroying... [id=terraform-sandbox-302013-my-storage]
google_storage_bucket.default: Destruction complete after 1s

Destroy complete! Resources: 1 destroyed.
Summary
In this article, we have learned what the HashiCorp Terraform is and how we can use it to manage our infrastructure using code safely and predictably.
Links:
https://www.terraform.io/
https://registry.terraform.io/
https://www.geeksforgeeks.org/terraform-cheat-sheet/
https://registry.terraform.io/providers/hashicorp/google/latest/docs/guides/getting_started
https://registry.terraform.io/providers/hashicorp/google/latest/docs/resources/storage_bucket
https://cloud.google.com/
https://cloud.google.com/storage/docs/naming-buckets
Check out our article about AWS EKS Auto Mode!
Meet the geek-tastic people, and allow us to amaze you with what it's like to work with j‑labs!
Contact us


