Your first Quarkus application
Your first Quarkus application can be challenging since getting familiar with new libraries and therefore changing your habits can make you feel lost and clueless. Let’s go through it together and make the experience as pleasant and exciting as it should be.
Getting started with Quarkus application
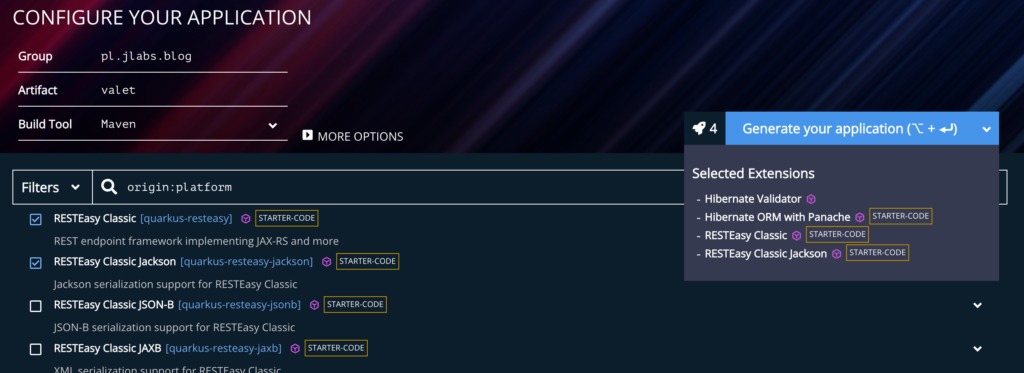
Similarly to Spring Initilzr, Quarkus offers a landing page, where you can prepare and download your project: https://code.quarkus.io/. For the sake of this article, let’s try to prepare the backend part of a parking reservation app called Valet:

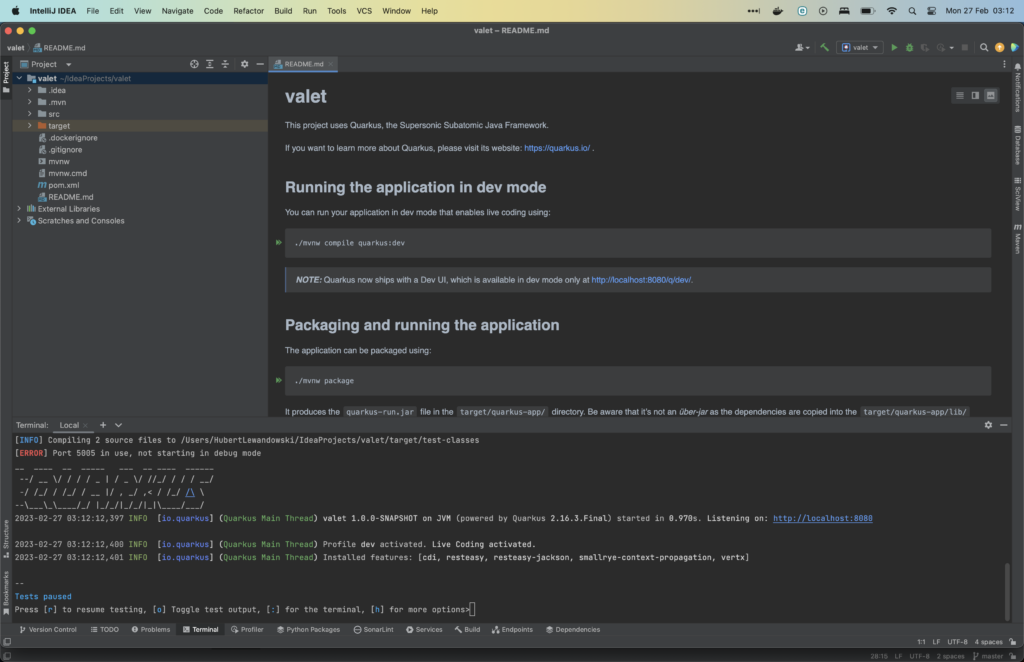
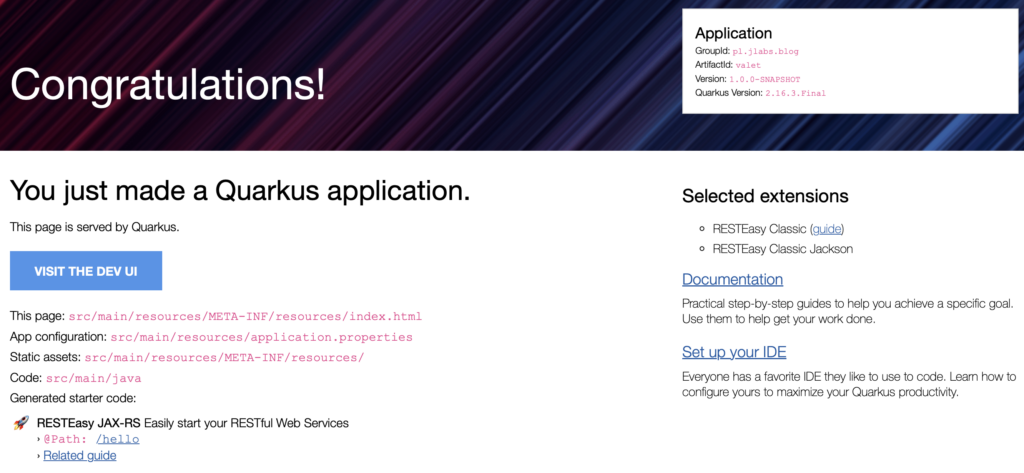
After picking application libraries you are able to generate a project zip file, download it and open it with your favourite IDE. The downloaded app is ready to be built and run in the development mode.


Creating resources
Our app is going to provide a parking spot resource with the ability of being reserved and then released. Let’s prepare such a resource with its CRUD functionalities:
package pl.jlabs.blog.valet;

import {...}

@Path("/spots")
@Consumes("application/json")
@Produces("application/json")
public class ParkingSpotResource {

    @Inject
    ParkingSpotService parkingSpotService;

    @POST
    public Response create(@Context UriInfo uriInfo, ParkingSpotDto spot) {
        parkingSpotService.create(spot);
        return Response.created(URI.create(uriInfo.getPath() + "/" + spot.getId())).build();
    }

    @GET
    public ParkingSpotsDto getAll() {
        return parkingSpotService.getAll();
    }

    @GET
    @Path("{id}")
    public ParkingSpotDto get(@PathParam("id") Long id) {
        return parkingSpotService.get(id);
    }

    @PUT
    @Path("{id}")
    public Response update(@PathParam("id") Long id, ParkingSpotDto spot) {
        parkingSpotService.update(id, spot);
        return Response.accepted(spot).build();
    }

    @DELETE
    @Path("{id}")
    public Response delete(@PathParam("id") Long id) {
        parkingSpotService.delete(id);
        return Response.noContent().build();
    }
}
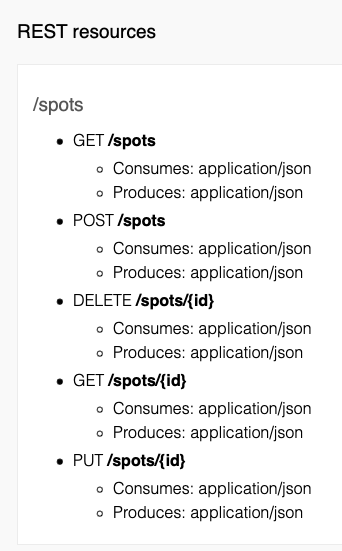
@Path annotation defines the path to a resource and endpoints within. @Consumes & @Produces define content type consumed and produced by the endpoints. @POST, @GET, @PUT & @DELETE define methods available inside a resource. All of that are standard JAX-RS annotations used to define how to access the service and Quarkus is able to treat them accordingly. Running the application with that class inside exposes new REST endpoint “/spots” with CRUD HTTP methods being attached to it. Given endpoints are also automatically added to Quarkus resources list available on server’s landing page:

Testing REST endpoints
In order to make the testing of the endpoints as smooth as any other part of the Quarkus experience, there is an annotation provided that controls the testing framework. It is a JUnit extension that starts the application underneath and handles its lifecycle during the testing. The application skeleton already contains example tests that only require the addition of the business logic:
package pl.jlabs.blog.valet;

import {...}

@QuarkusTest
@TestMethodOrder(OrderAnnotation.class)
public class ParkingSpotResourceTest {

    @Test
    @Order(1)
    public void create_shouldReturn201AndLocation() {
        RestAssured
                .given()
                    .contentType("application/json")
                    .body(spot())
                .when()
                    .post("/spots")
                .then()
                    .statusCode(HttpStatus.SC_CREATED)
                    .header("Location", endsWith("/spots/1"));
    }

    @Test
    @Order(2)
    public void get_shouldReturn200AndSomeBody() {
        RestAssured
                .when()
                    .get("/spots/1")
                .then()
                    .statusCode(200)
                    .body(notNullValue());
    }

    @Test
    @Order(3)
    public void update_shouldReturn202AndSomeBody() {
        RestAssured
                .given()
                    .contentType("application/json")
                    .body(unavailableSpot())
                .when()
                    .put("/spots/1")
                .then()
                    .statusCode(HttpStatus.SC_ACCEPTED)
                    .body(notNullValue());
    }

    @Test
    @Order(4)
    public void getAll_shouldReturn200AndSomeBody() {
        RestAssured
                .when()
                    .get("/spots")
                .then()
                    .statusCode(200)
                    .body(notNullValue());
    }

    @Test
    @Order(5)
    public void delete_shouldReturn204() {
        RestAssured
                .when()
                    .delete("/spots/1")
                .then()
                    .statusCode(HttpStatus.SC_NO_CONTENT)
                    .body(notNullValue());
    }

    String spot() {
        var spot = new JsonObject();
        spot.put("id", "1");
        spot.put("isAvailable", "true");
        return spot.encode();
    }
}
The Quarkus team strongly suggests using REST Assured as the most convenient way of testing HTTP endpoints.

Data storage with the Panache framework
A very important aspect of working with Quarkus is its simplified access to data storage. Over the years Hibernate ORM overgrew with a number of annoying things that users need to reluctantly deal with. The examples, among others, are splitting the definition of data (the model) with its operations (which is the antithesis of the Object-Oriented architecture) or being overly verbose for common operations and not being suitable for simple data access (whereas using plain JDBC might feel crude).
These problems have been tackled with Panache. An entity might extend the PanacheEntity class and be transformed into an active record. The object model and its behaviour can now be kept together like we all are used to and there’s no need to create DAOs or Repositories.
In order to start working with a Panache, you just need to add a dependency to your pom/gradle file along with jdbc driver of your choice:
<!-- Hibernate ORM specific dependencies -->
<dependency>
    <groupId>io.quarkus</groupId>
    <artifactId>quarkus-hibernate-orm-panache</artifactId>
</dependency>

<!-- JDBC driver dependencies -->
<dependency>
    <groupId>io.quarkus</groupId>
    <artifactId>quarkus-jdbc-postgresql</artifactId>
</dependency>
# configure your datasource
quarkus.datasource.db-kind = postgresql
quarkus.datasource.username = valet_user
quarkus.datasource.password = valet_password
quarkus.datasource.jdbc.url = jdbc:postgresql://localhost:5432/valet
# drop and create the database at startup (use `update` to only update the schema)
quarkus.hibernate-orm.database.generation = drop-and-createHere’s an example of what a Parking Spot Entity from the previous example could look like:
package pl.jlabs.blog.valet.data;

import {...}

@Entity
public class ParkingSpotEntity extends PanacheEntity {

    @Nonnull
    public Boolean available;

    public static List<ParkingSpotEntity> findAllAvailable() {
        return list("available", true);
    }
}
Having an entity defined like that we can already do many operations on a Parking Spots data set: persist(), listAll(), count(), findById(id), deleteById(id) and many others. Additionally, as you can see, creating simple queries based on one or many entities’ fields is also very simple. The id of an entity is hidden inside the PanacheEntity class.
Testing such an active record might seem problematic at the beginning as the record uses static methods. Thankfully, Quarkus provides a panache-mock which allows us to use Mockito to mock all the provided static methods including the ones introduced by ourselves:
<dependency>
    <groupId>io.quarkus</groupId>
    <artifactId>quarkus-panache-mock</artifactId>
    <scope>test</scope>
</dependency>
@Test
public void createShoulWriteToDb() {
//given
PanacheMock.mock(ParkingSpotEntity.class);
Mockito.when(ParkingSpotEntity.findAll()).thenReturn(Collections.emptyList());
//when
parkingSpotService.create(parkingSpotDto);
//then
PanacheMock.verify(ParkingSpotEntity.class, Mockito.atLeast(1)).persist();
}Summary
In this article we were able to create our first Quarkus application exposing CRUD HTTP endpoints along with proper tests and a db persistence layer. All in a matter of few lines of code and configuration. I hope that I was able to make you interested in this exciting framework. I hope you will have plenty of fun exploring it further on your own.
Read also: How to debug JavaScript!
Meet the geek-tastic people, and allow us to amaze you with what it's like to work with j‑labs!
Contact us


